Table of Contents
Microgreens salad mix has taken the culinary world by storm in recent years. These tiny, nutrient-packed greens add a burst of flavor, color, and nutrition to any dish. Whether you're a health-conscious foodie or an aspiring home gardener, microgreens salad mix is a versatile and exciting addition to your repertoire.
In this comprehensive guide, we'll delve into the world of microgreens salad mix, exploring its health benefits, offering tips on how to grow your own, and sharing some mouthwatering recipes to tantalize your taste buds.
What Are Microgreens?
Microgreens, often dubbed “nutrient powerhouses,” are a fascinating category of young, edible plants that are harvested at a very early stage of their growth, usually when they have just sprouted their first set of true leaves. These miniature greens are not only visually appealing but also densely packed with an impressive array of flavors, textures, and nutrients.
These tiny wonders can be cultivated from a wide range of plant varieties, showcasing a diverse palette of tastes and colors. From the peppery zest of arugula to the sweet and aromatic notes of basil, and the crisp bite of radishes, microgreens offer an abundance of culinary possibilities.
Beyond their tantalizing flavors, microgreens are prized for their nutritional value. Studies have shown that they can contain significantly higher concentrations of vitamins, minerals, and antioxidants compared to their mature counterparts.
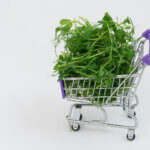
As a result, they have gained popularity not only in fine dining establishments but also in health-conscious households and urban gardening enthusiasts who appreciate their quick growth and compact size. Whether you're looking to elevate your dishes with vibrant flavors or boost your dietary intake of essential nutrients, microgreens are a versatile and wholesome addition to your culinary repertoire.
Nutritional Benefits of Microgreens Salad Mix
Microgreens, despite their diminutive size, are nutritional powerhouses that offer a wide array of health benefits. Delve deeper into their impressive nutritional profile to understand why they're gaining popularity as a dietary essential:
Abundant in Vitamins and Minerals
Microgreens are dense sources of essential vitamins, including vitamin C, which boosts the immune system, vitamin K for blood clotting and bone health, and vitamin E, known for its antioxidant properties. They also contain vital minerals such as potassium, which aids in heart health, and iron, necessary for oxygen transport in the body. Incorporating microgreens into your diet can help ensure you're getting these essential nutrients for overall health.
Antioxidant Powerhouse
The vibrant hues of microgreens are not just visually appealing; they signify high levels of antioxidants. Antioxidants play a crucial role in neutralizing free radicals in the body, which can otherwise lead to oxidative stress and chronic diseases. Including microgreens in your meals can contribute to your body's defense against these health threats and support a robust immune system.
Fiber and Digestive Wellness
Microgreens are not just about vitamins and minerals; they also provide dietary fiber. Fiber is essential for digestive health as it promotes regular bowel movements, prevents constipation, and fosters a balanced gut microbiome. By incorporating microgreens into your diet, you can enhance your digestive well-being.
Calorie-Conscious Choice
For those mindful of calorie intake, microgreens are a smart choice. They are incredibly low in calories while offering a burst of flavor and nutrition. You can enjoy their delicious taste without significantly impacting your daily caloric consumption, making them a valuable addition to any weight management plan.
Skin Nourishment
Microgreens also contribute to healthy, radiant skin. Their vitamins and antioxidants play a role in combating the signs of aging, promoting skin elasticity, and shielding against environmental damage. Including microgreens in your diet can be seen as a holistic approach to skincare from the inside out.
Read also our post on China Rose Radish Microgreens
Growing Microgreens Salad Mix
Now that you understand the incredible health benefits of microgreens, let's explore how to grow your own delicious and nutritious microgreens salad mix.
Choosing the Right Microgreens Varieties
When crafting your microgreens salad mix, it's essential to consider the diverse range of flavors and textures that different microgreens bring to the table. Here's a closer look at some popular microgreens varieties that can elevate your salad's taste and visual appeal:
- Arugula: This microgreen offers a delightful peppery kick, adding a bold and zesty flavor to your salad. It's a favorite choice for those who enjoy a touch of spiciness in their greens.
- Radishes: If you're seeking a mild spice and a satisfying crunch, radish microgreens are an excellent pick. They introduce a subtle heat that complements various salad ingredients.
- Broccoli: For a milder, slightly sweet flavor with a tender texture, consider adding broccoli microgreens. They bring a delicate freshness to your salad mix.
- Kale: Kale microgreens are known for their hearty and earthy taste. They provide a robust and slightly nutty flavor profile that adds depth to your salad.
- Basil: Basil microgreens infuse your salad with a sweet and aromatic essence, reminiscent of the classic herb. They are perfect for those looking to impart a delightful herbal note to their dishes.
You can choose a single variety or mix and match to create a dynamic blend of flavors.
Supplies You'll Need
Starting your microgreens garden is an exciting venture that requires a careful selection of supplies to ensure successful cultivation. Here's an extensive list of the essential items you'll need to get your microgreens growing journey underway:
- Seeds: The foundation of your microgreens garden begins with high-quality seeds. Sourcing your seeds from a reputable supplier ensures that you have a wide variety of microgreens to choose from and guarantees the best chances of successful germination and growth.
- Growing Medium: A critical aspect of microgreens cultivation is the choice of a suitable growing medium. Opt for soilless options such as coconut coir or peat moss, as they provide a sterile and nutrient-rich environment for your tiny plants to thrive.
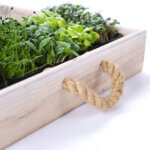
- Containers: The choice of containers can vary based on your preferences and space availability. You can use specialized microgreens trays, shallow pots, or even repurpose items like egg cartons, provided they offer sufficient depth for root growth.
- Light Source: Adequate light is essential for healthy microgreens growth. Depending on your location and setup, you can harness natural sunlight by placing your containers near a sunny window or use dedicated grow lights designed to provide the optimal spectrum and intensity required for rapid growth.
- Watering Can: Microgreens demand gentle and precise watering. A watering can with a fine nozzle allows you to provide consistent moisture without disturbing the delicate seedlings.
- Ventilation: Proper air circulation is vital to prevent issues like mold and damping off. In indoor settings, consider using a small fan to maintain airflow around your microgreens.
- Labels: Keeping track of the varieties you're growing is crucial, especially if you're experimenting with different types of microgreens. Use labels or markers to identify each container, ensuring you can monitor their progress and flavors effectively.
Additionally, consider investing in:
- pH Testing Kit: Monitoring and adjusting the pH of your water or growing medium can be essential for healthy microgreens growth, as it affects nutrient uptake.
- Spray Bottle: A fine mist spray bottle can be handy for providing humidity to your microgreens during their early stages of growth.
- Trays or Shelving: If you're growing multiple containers, trays or shelving units can help you organize and maximize space, making it easier to manage your microgreens garden efficiently.
Step-by-Step Growing Instructions
Embarking on the journey of growing microgreens salad mix can be both rewarding and nutritious. To ensure a successful harvest, follow this detailed step-by-step guide:
Step 1: Prepare Your Containers
Begin by selecting your containers. Whether you opt for specialized microgreens trays, shallow pots, or repurposed items, ensure they are clean and free of contaminants. Fill them with your chosen growing medium, leaving approximately half an inch of space from the top. The growing medium should be well-suited to promote healthy root development and nutrient absorption.
Step 2: Sow the Seeds
With the containers prepared, it's time to sow your microgreens seeds. Sprinkle the seeds evenly over the soil surface, ensuring that they are not densely packed. Adequate spacing allows room for each seedling to develop without competing for resources garden gettogether livestream.
Step 3: Watering
Provide a gentle and even watering to the freshly sown seeds. This can be achieved using a watering can with a fine nozzle or a misting spray bottle. The aim is to keep the soil consistently moist without saturating it. Be cautious not to waterlog the growing medium, as excess moisture can lead to mold and other issues.
Step 4: Provide Adequate Light
Microgreens thrive on light. Place your containers in a location that receives adequate sunlight or invest in grow lights specifically designed for optimal microgreens growth. Aim for 4-6 hours of indirect sunlight daily, adjusting the distance from the light source to prevent scorching or leggy growth.
Step 5: Maintain Moisture and Ventilation
Consistent moisture is crucial for healthy microgreens development. Monitor the soil's moisture level and water as needed to prevent drying out. Adequate air circulation is equally important; consider using a small fan to promote ventilation and reduce the risk of mold or damping off.
Step 6: Harvesting
Microgreens reach their harvest-ready stage in approximately 1-3 weeks, depending on the variety. To harvest, use scissors or a sharp knife to cut the microgreens just above the soil line when they have reached a height of 1-2 inches. Harvesting at this stage ensures the best flavor and nutritional value.
Common Mistakes to Avoid
While cultivating microgreens is generally considered a straightforward endeavor, it's essential to be aware of common pitfalls to maximize your success. Here's an in-depth exploration of the mistakes to avoid:
- Overcrowding: One of the most prevalent mistakes is planting too many seeds in a confined space. Overcrowding can lead to fierce competition among seedlings for essential resources like nutrients, water, and light. To prevent this, ensure even spacing when sowing your seeds. Adequate room for growth is vital for healthy microgreens development.
- Overwatering: Maintaining the right moisture level is a delicate balance. While microgreens thrive in consistently moist soil, overwatering can be detrimental. It may result in waterlogged soil, leading to mold growth and root rot. To avoid this, monitor the soil's moisture level closely and water only when needed. Allow the soil to dry slightly between waterings, preventing excessive wetness.
- Insufficient Light: Microgreens are light-dependent, and inadequate illumination can have adverse effects. Without enough light, microgreens may stretch towards the light source, becoming leggy and pale. To counter this, ensure your microgreens receive 4-6 hours of indirect sunlight daily. In indoor settings, invest in dedicated grow lights with the appropriate spectrum and intensity to support robust growth.
- Ignoring Air Circulation: Proper ventilation is often overlooked but plays a crucial role in microgreens cultivation. Inadequate airflow can promote the growth of mold and other fungal issues. To prevent this, consider using a small fan in your indoor setup to maintain consistent air circulation. If growing outdoors, ensure your microgreens receive natural breezes, or open windows and doors periodically to encourage airflow.
Harvesting and Storing Microgreens
The act of harvesting microgreens is not only rewarding but also a crucial step in enjoying their freshness and flavor. Here's a detailed guide on how to harvest and store your microgreens effectively:
Timing is Key
The ideal time to harvest microgreens is when they have reached a height of about 1 to 2 inches and have developed their first true leaves. This stage typically occurs within 7 to 21 days after planting, depending on the variety and growing conditions micro salad mix.
Tools of the Trade
To harvest your microgreens, use clean scissors or a sharp knife. Gently grasp a small bunch of microgreens just above the soil line and snip them cleanly. Avoid pulling the greens as this can disturb the roots and soil.
Proper Handling
Handle the microgreens with care during harvesting to prevent bruising or damage. The delicate nature of microgreens means they can wilt or lose their freshness if mishandled.
Storage Solutions
After harvesting, it's essential to store your microgreens correctly to prolong their freshness. Line an airtight container or a resealable plastic bag with a damp paper towel. Place the harvested microgreens on top of the paper towel, arranging them in a single layer. The damp paper towel helps maintain the right level of moisture while preventing direct contact with the container, which can lead to moisture buildup and spoilage.
Refrigeration
Store the container of microgreens in the refrigerator. The cool temperature slows down the aging process, keeping the microgreens fresh for an extended period. Ideally, microgreens can stay crisp and vibrant for up to a week when stored this way.
Check and Refresh
Periodically check the damp paper towel to ensure it remains moist. If it dries out, simply dampen it again with a small amount of water. This step helps maintain the necessary humidity levels for your microgreens.
Delicious Recipes Using Microgreens Salad Mix
Now that you have a bountiful harvest of microgreens, let's explore some delectable recipes to elevate your culinary experience basic salad mix microgreens seeds.
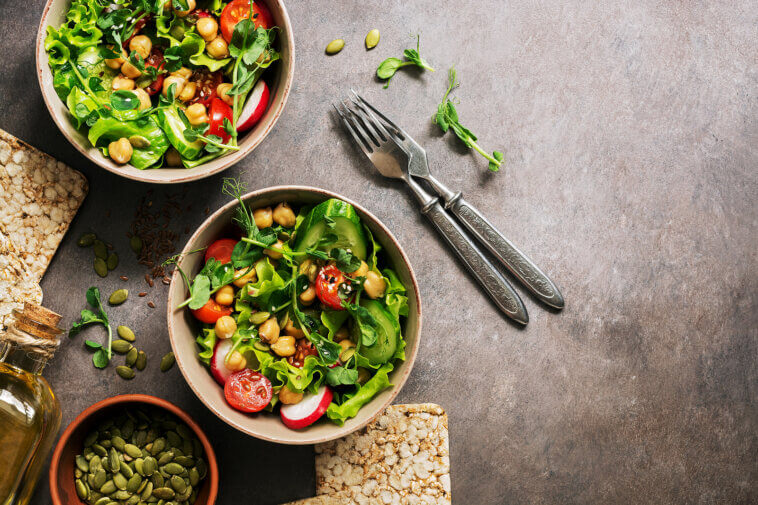
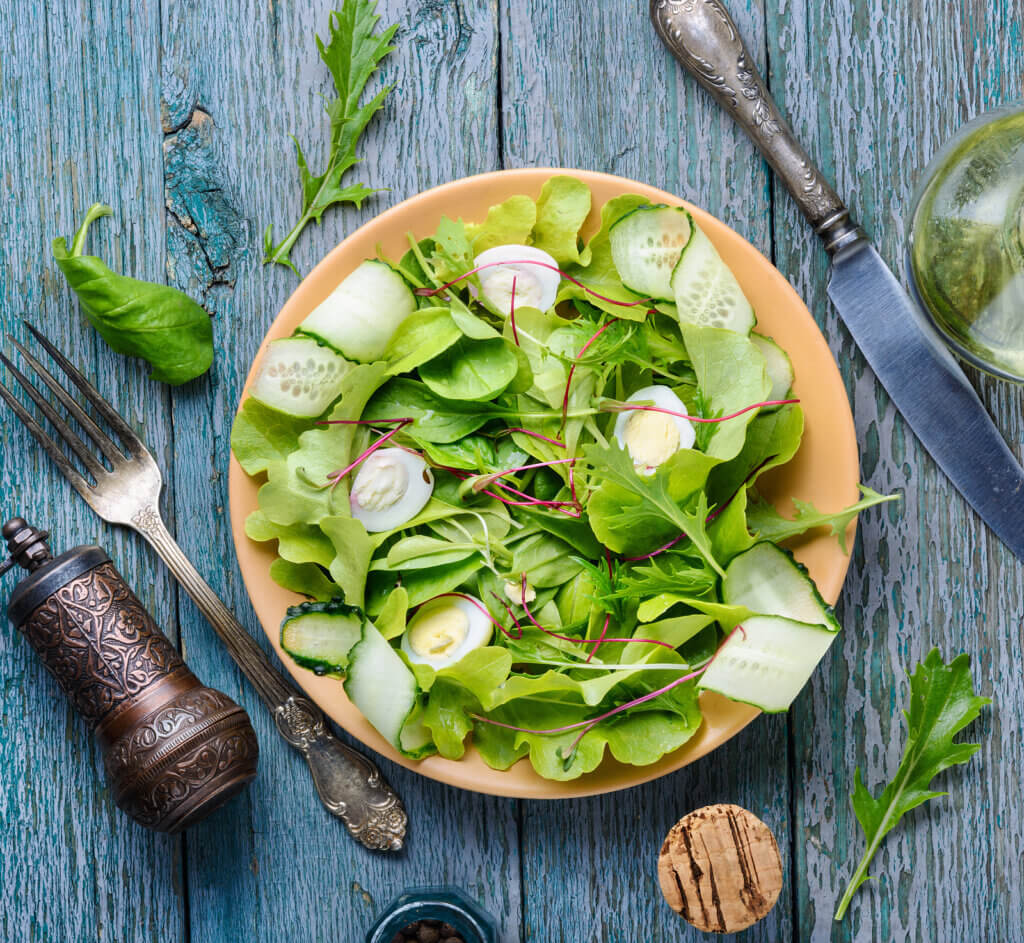
Microgreens Salad with Lemon Vinaigrette
Prepare to tantalize your taste buds and nourish your body with this delightful Microgreens Salad featuring a zesty Lemon Vinaigrette. Here's how to craft this flavorful and nutritious dish:
Ingredients:
- A diverse mix of microgreens (consider including varieties like arugula, radishes, kale, and basil for a symphony of flavors and textures).
- 2 tablespoons of high-quality extra virgin olive oil.
- 1 tablespoon of freshly squeezed lemon juice, for a burst of citrusy brightness.
- 1 teaspoon of honey, adding a touch of natural sweetness to balance the flavors.
- Salt and pepper, to season according to your preference.
- Optional toppings for added texture and flavor: ripe cherry tomatoes, a sprinkle of your favorite nuts (such as almonds or walnuts), and crumbled feta cheese.
Instructions:
- Prepare the Lemon Vinaigrette: In a small bowl, embark on the first step of culinary magic by whisking together the olive oil, lemon juice, honey, and a pinch of salt and pepper. This combination will form a delectable Lemon Vinaigrette, infusing your microgreens with a harmonious blend of tangy and sweet flavors.
- Toss the Microgreens: In a generous salad bowl, assemble your vibrant mix of microgreens. The selection of microgreens offers a symphony of tastes, from peppery arugula to the earthy richness of kale, all complemented by the basil's aromatic notes. Drizzle the Lemon Vinaigrette over the microgreens, ensuring each delicate leaf is lovingly coated.
- Add Optional Toppings: To elevate your salad to new heights, sprinkle ripe cherry tomatoes for juicy bursts of freshness, toss in a handful of your preferred nuts for added crunch and richness, and crumble feta cheese to introduce a creamy and salty dimension to the ensemble. These optional toppings not only enhance the salad's flavor but also contribute to its visual appeal.
- Serve and Savor: Your culinary masterpiece is now complete. Present your Microgreens-Salad with Lemon Vinaigrette as a star attraction at your dining table. Whether enjoyed as a nutritious appetizer, a side dish, or a light and wholesome meal, this salad promises a symphony of flavors and a burst of essential nutrients.
Microgreens Pesto Pasta
Indulge in a culinary delight that celebrates the freshness and flavors of microgreens with this Microgreens Pesto Pasta recipe. Here's how to create a nutritious and aromatic pesto sauce from microgreens and pair it with your favorite cooked pasta:
Ingredients:
- 2 cups of a dynamic duo of microgreens, featuring the rich basil and the robust kale varieties.
- 1/2 cup of freshly grated Parmesan cheese, adding a creamy and savory dimension to the pesto.
- 1/2 cup of toasted pine nuts, offering a delightful nutty crunch and depth of flavor.
- 2 cloves of garlic, infusing the pesto with aromatic notes.
- 1/2 cup of high-quality olive oil, providing a luscious and silky texture.
- Salt and pepper, allowing you to season your pesto to perfection.
- Cooked pasta of your choice, which will serve as the canvas for this delectable pesto creation.
Instructions:
- Prepare the Pesto: Begin by assembling your food processor, a trusty kitchen companion for this recipe. Add the 2 cups of microgreens, the 1/2 cup of grated Parmesan cheese, the 1/2 cup of toasted pine nuts, and the 2 cloves of garlic to the food processor's bowl. These ingredients form the heart of your microgreens pesto.
- Blend to Perfection: Pulse the mixture in the food processor while slowly drizzling in the 1/2 cup of olive oil. This gradual addition allows you to control the pesto's consistency, resulting in a lush and harmonious blend. Continue blending until the pesto reaches your desired texture, whether you prefer it smooth or with a bit of texture.
- Season to Taste: With the pesto beautifully blended, season it with salt and pepper according to your taste preferences. The right balance of salt and pepper will elevate the flavors of the microgreens and enhance the overall dish.
- Combine with Pasta: Cook your favorite pasta according to the package instructions until it reaches the desired level of tenderness. Drain the pasta and return it to the pot. Add the freshly prepared microgreens pesto to the pasta, gently tossing until each strand is adorned with the flavorful pesto sauce.
- Serve and Enjoy: Your Microgreens Pesto Pasta is now ready to delight your senses. Plate it up and savor the vibrant colors, exquisite aromas, and delightful flavors that this dish offers. Whether as a quick weeknight dinner or a special occasion treat, this pasta dish showcases the versatility and nutritional benefits of microgreens in a scrumptious and satisfying way.
Microgreens Smoothie
Start your day with a burst of vitality and a nutritious kick by preparing a Microgreens Smoothie. This innovative and health-conscious recipe combines an array of microgreens with other wholesome ingredients to create a revitalizing morning beverage. Here's how to concoct this green elixir:
Ingredients:
- 1 cup of a delightful mix of microgreens, combining the peppery notes of arugula, the zesty crunch of radishes, and the nutrient-rich goodness of kale.
- 1 banana, providing creaminess and natural sweetness.
- 1/2 cup of frozen berries, delivering vibrant colors, antioxidants, and a refreshing taste.
- 1/2 cup of Greek yogurt, enhancing creaminess and adding a protein boost.
- 1 tablespoon of honey, a touch of natural sweetness to balance the flavors.
- 1 cup of almond milk, a dairy-free alternative that complements the green goodness of the microgreens.
Instructions:
- Gather the Ingredients: Assemble your ingredients, ensuring that the microgreens are fresh and vibrant. You can adjust the quantities to suit your taste preferences and desired consistency.
- Blend the Green Goodness: In a high-speed blender, combine the 1 cup of mixed microgreens, the 1 banana, the 1/2 cup of frozen berries, the 1/2 cup of Greek yogurt, the 1 tablespoon of honey, and the 1 cup of almond milk. These components come together to create a symphony of flavors and textures, with the microgreens as the star of the show.
- Blend to Perfection: Start your blender on low speed and gradually increase it to high. Continue blending until your Microgreens Smoothie achieves a smooth and creamy consistency. This process usually takes just a minute or so, but you can adjust the blending time to your preference, depending on how smooth you prefer your smoothie.
- Pour and Savor: Once your Microgreens Smoothie is velvety and well-blended, pour it into a glass and appreciate its vibrant green color. This rejuvenating beverage is now ready to be savored.
- Enjoy Your Nutrient-Rich Microgreens Smoothie: Sip and savor your Microgreens Smoothie, relishing the harmonious combination of flavors, the creaminess of the banana and Greek yogurt, and the refreshing burst of berries. With each sip, you'll also benefit from the nutritional goodness of microgreens, adding vitamins, minerals, and antioxidants to your morning routine.
Conclusion
In my personal experience as an aspiring home gardener, the world of microgreens salad mix has been a revelation. These tiny greens have not only added a burst of flavor, color, and nutrition to my dishes but have also made gardening more accessible and rewarding. Growing microgreens has been a joy, regardless of the size of my gardening space, and the speed at which they sprout and flourish is truly astonishing.
Microgreens' impressive nutritional profile has been a game-changer for me. Their abundance of vitamins, minerals, and antioxidants has allowed me to infuse my meals with health benefits while indulging in delightful flavors. The recipes I've explored, from the zesty salad to the comforting pasta and refreshing smoothie, have demonstrated the culinary versatility of microgreens.
Incorporating them into my culinary journey has not only been trendy but has enriched my meals with nourishing and visually appealing ingredients. So, whether you're an experienced chef or a beginner gardener like me, I encourage you to embrace microgreens and experience the magic they bring to your kitchen and overall well-being. Happy growing and savoring!
Sources
https://www.ncbi.nlm.nih.gov/pmc/articles/PMC9864543/
https://ift.onlinelibrary.wiley.com/doi/full/10.1111/1750-3841.15049
Comments
Loading…